Kitchen Ceiling Light Size & Wattage Guide for Perfect Illumination
Finding the right ceiling light size and wattage for your kitchen really boils down to balancing practical needs with the look you’re going for. It’s not just about one big light; often, a layered approach with different types of fixtures works best to give you comfortable, functional lighting without harsh shadows or a dim, uninviting space. We’ll dive into how to figure out what works for your specific kitchen, from the overall size of the room to the tasks you perform there, and the kind of bulbs that make all the difference.
Understanding Kitchen Lighting Needs
When it comes to kitchen lighting, it’s more than just flipping a switch. Your kitchen is a multi-functional space: you cook, you clean, you eat, you socialize, and sometimes you even work or help kids with homework. This means a single, central light rarely cuts it. Effective kitchen lighting aims to create a bright, inviting atmosphere while also providing focused illumination where it’s most needed.
The Layered Lighting Approach
Think of kitchen lighting in layers – it’s a concept that significantly improves both the functionality and ambiance of your space. Instead of one powerful fixture trying to do everything, you’re distributing the workload and getting much better results.
Ambient Lighting
This is your general illumination, the overall brightness that fills the room. It’s what allows you to move around safely and comfortably without bumping into things. For kitchens, ambient lighting often comes from a central ceiling fixture like a flush mount, semi-flush mount, or even recessed lighting. The goal here isn’t intense brightness, but rather a consistent, soft glow that establishes the foundational light level. It sets the mood for the entire kitchen.
Task Lighting
This is where the precision comes in. Task lighting is focused illumination aimed directly at areas where you perform specific activities. In a kitchen, these are typically your countertops where you chop vegetables, read recipes, or mix ingredients, and often above the sink or stove. Under-cabinet lighting is a prime example of task lighting, as are pendant lights hanging over an island or peninsula. This type of lighting is crucial for safety and efficiency, reducing eye strain and making detailed work much easier. Without good task lighting, even a brightly lit room can feel inadequate for cooking.
Accent Lighting
Accent lighting is all about highlighting features and adding visual interest. While not as critical for functionality as ambient or task lighting, it plays a big role in the aesthetic appeal of your kitchen. This could involve small puck lights inside glass-front cabinets to showcase dishes, track lighting aimed at a piece of artwork, or even subtle toe-kick lighting under base cabinets to create a floating effect. It adds depth and character, making the kitchen feel more thoughtfully designed and inviting.
Common Kitchen Light Types
Different fixtures serve different purposes and contribute to these lighting layers. Knowing the options helps you pick the right tools for the job.
Recessed Lights (Pot Lights)
These are fixtures installed directly into the ceiling, creating a seamless look. They’re excellent for ambient lighting, especially in modern kitchens, and can be strategically placed to provide general illumination without cluttering the ceiling. They’re discreet and efficient, often used in grids for even coverage.
Flush Mounts and Semi-Flush Mounts
These fixtures attach directly to the ceiling (flush) or hang slightly below it (semi-flush). They are good choices for ambient lighting in kitchens with lower ceilings, as they don’t protrude too much. They come in countless styles, offering both functional light and a decorative element.
Pendant Lights
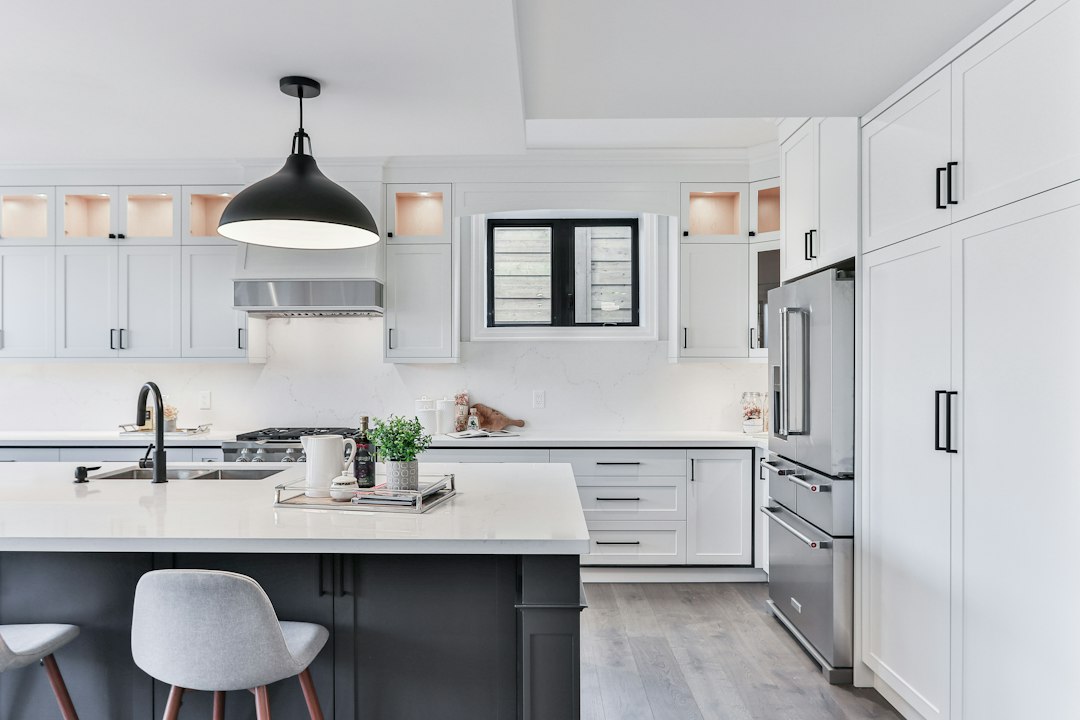
Pendants hang from the ceiling, usually by a cord, rod, or chain, and are often used in multiples. They are fantastic for task lighting over islands, peninsulas, or sinks, providing focused downward light. They also serve as a strong decorative element, drawing the eye and adding a touch of style.
Under-Cabinet Lighting
As mentioned, this is a quintessential task lighting solution. Installed directly beneath upper cabinets, it illuminates countertops effectively, eliminating shadows cast by overhead ambient lights. Options include LED strips, puck lights, or linear fluorescent fixtures.
Track Lighting
This versatile system consists of multiple light heads attached to a track, allowing you to direct light exactly where it’s needed. It can provide a combination of ambient, task, and accent lighting, making it highly adaptable for various kitchen layouts and needs.
Sizing Your Kitchen Ceiling Lights
Choosing the right size for your main ceiling fixture isn’t an exact science, but there are some helpful guidelines to ensure it looks proportionate and provides adequate light spread. A fixture that’s too small can look lost and won’t distribute light effectively, while one that’s too large can overwhelm the space.
The General Rule of Thumb for Fixture Diameter
A common method for estimating the appropriate diameter of a central ceiling fixture (like a flush mount, semi-flush mount, or even a larger pendant if it’s the sole ambient source) involves your room’s dimensions.
Add the length and width of your kitchen in feet. The sum of these two numbers gives you a good starting point for the ideal diameter of your fixture in inches.
- Example: If your kitchen is 10 feet wide and 12 feet long:
10 feet + 12 feet = 22 feet
So, you’d look for a fixture with a diameter of approximately 22 inches.
This rule provides a balanced look and ensures the fixture is scaled appropriately to the room. It’s a starting point, though; ceiling height and other lighting elements will influence the final decision.
Considering Ceiling Height
Ceiling height plays a crucial role in how a light fixture looks and performs.
Low Ceilings (8 feet or less)
For kitchens with lower ceilings, you’ll generally want fixtures that don’t hang down too far. Flush mount lights are excellent here, as they sit directly against the ceiling, maximizing headroom. Semi-flush mounts can also work, but ensure the overall drop isn’t impeding movement or sightlines. Recessed lighting is another prime choice for low ceilings, as it’s entirely flush. Avoid large, bulky fixtures or long pendants unless they are specifically over an island where clearance is less of an issue.
Standard Ceilings (9-10 feet)
With standard ceiling heights, you have more flexibility. Flush mounts, semi-flush mounts, and many chandeliers or larger pendants can work well. The ‘length + width in feet = diameter in inches’ rule is particularly effective here. For pendants over an island, aim for the bottom of the fixture to be about 30-36 inches above the countertop for comfortable task lighting and clear views.
High Ceilings (10 feet and above)
High ceilings offer dramatic opportunities but require careful consideration to ensure light reaches the lower parts of the room effectively. Larger, more substantial fixtures, chandeliers, or pendants with longer stems/chains are often appropriate. You’ll need fixtures with higher lumen output to compensate for the increased distance to the work surfaces. Be mindful that light from very high fixtures can spread widely, so you might need more concentrated task lighting below.
Sizing Pendant Lights for Islands/Peninsulas
Pendant lights over an island or peninsula are a popular choice for both task lighting and aesthetic appeal. The key is to get the spacing and number right.
Number of Pendants
- Small Island (under 5 feet): One larger pendant or two smaller ones might be sufficient.
- Medium Island (5-7 feet): Two to three pendants are typically ideal.
- Large Island (over 7 feet): Three or more pendants, or potentially a linear pendant fixture, will provide adequate coverage.
Spacing Pendants
To achieve good coverage and a balanced look, aim for even spacing.
- Start by measuring the total length of your island.
- Subtract the combined width of all your pendants from the island length.
- Divide the remaining number by the number of gaps you’ll have (one more than the number of pendants). This gives you the approximate spacing between the centers of each pendant and from the ends of the island.
- Generally, pendants should be spaced about 24-30 inches apart (center to center), and roughly 12-18 inches from the ends of the island. This ensures light is spread evenly across the surface.
Pendant Height
As mentioned earlier, the bottom of the pendant should typically be 30-36 inches above the countertop. This height allows for comfortable work without glare and doesn’t obstruct the view across the island. Adjust slightly based on the height of the people using the kitchen – taller individuals might prefer them a bit higher.
Determining Kitchen Lighting Wattage (Lumens)
Forget wattage as the primary measure of brightness; it’s an outdated concept for modern LED lighting. What you really need to focus on is lumens. Lumens measure the actual light output of a bulb or fixture, which is a much more accurate way to compare brightness.
Lumens vs. Watts
- Watts: Measure the amount of electricity a bulb consumes. An old incandescent 60-watt bulb consumes 60 watts to produce light.
- Lumens: Measure the total amount of visible light produced by a light source. A modern LED bulb might only consume 8-10 watts but produce the same 800 lumens as a traditional 60-watt incandescent.
So, when planning your lighting, think in lumens.
Recommended Lumens for Kitchens
The total lumen output you need for your kitchen depends on its size and the overall brightness you desire. Kitchens generally require higher light levels than other rooms because of the detailed tasks performed there.
A good general guideline for kitchens is to aim for 30-40 lumens per square foot. Some sources even suggest up to 50 lumens per square foot for very bright task areas.
Calculation Example:
- Measure your kitchen’s square footage: Let’s say your kitchen is 10 feet by 12 feet.
Area = 10 ft * 12 ft = 120 square feet.
- Calculate total desired lumens:
- For a moderately bright kitchen (30 lumens/sq ft): 120 sq ft * 30 lumens/sq ft = 3600 lumens.
- For a brighter kitchen (40 lumens/sq ft): 120 sq ft * 40 lumens/sq ft = 4800 lumens.
This total lumen figure should be distributed among all your light sources – ambient, task, and accent. For instance, if you have multiple recessed lights, under-cabinet lighting, and pendants, their combined lumen output should meet this target.
Distribution of Lumens by Layer
It’s not just about the total lumens, but how they are distributed.
- Ambient Lighting: This layer should provide about 50-70% of your total desired lumens. It sets the baseline brightness. For our 120 sq ft kitchen needing 4800 lumens total, ambient lighting would account for roughly 2400-3360 lumens. If you use 6 recessed lights, each would need to output 400-560 lumens.
- Task Lighting: This is critical for functionality and often accounts for 20-30% of your total lumens. This light needs to be focused and typically brighter per square foot in the specific work areas. Under-cabinet lighting, for example, might contribute a significant portion of this.
- Accent Lighting: This is usually a smaller portion, perhaps 5-10% of total lumens, designed to highlight specific features without adding much to overall room brightness.
Choosing Bulb Types and Their Lumen Output
The type of bulb you choose greatly impacts lumen output, energy consumption, and light quality.
LED (Light Emitting Diode) Bulbs
LEDs are the gold standard for modern kitchen lighting.
- Pros: Highly energy-efficient (up to 80-90% less energy than incandescents), long lifespan (tens of thousands of hours), available in a wide range of color temperatures, durable, dimmable options available. They produce very little heat compared to traditional bulbs.
- Cons: Higher initial cost (though prices have come down significantly), can sometimes have compatibility issues with older dimmer switches (always use LED-compatible dimmers).
- Typical Lumen Output:
- Small accent bulbs: 100-300 lumens
- Standard A19 replacement for 40W incandescent: 450 lumens
- Standard A19 replacement for 60W incandescent: 800 lumens
- Standard A19 replacement for 75W incandescent: 1100 lumens
- Standard A19 replacement for 100W incandescent: 1600 lumens
Halogen Bulbs
Halogens are an upgraded version of incandescents.
- Pros: Good color rendering, instant full brightness, dimmable.
- Cons: Less energy-efficient than LEDs (though better than traditional incandescents), produce a fair amount of heat, shorter lifespan than LEDs. They are being phased out in many regions due to energy efficiency concerns.
- Typical Lumen Output: Generally similar to traditional incandescents for a given wattage.
Fluorescent (CFLs and Linear)
Compact Fluorescent Lamps (CFLs) and linear fluorescent tubes were once popular for energy efficiency but are now largely superseded by LEDs.
- Pros: More energy-efficient than incandescents/halogens, longer lifespan than incandescents.
- Cons: Contain mercury, can hum, some take time to reach full brightness, limited dimming capabilities, can have less appealing color quality.
- Typical Lumen Output: Varies widely by size and type.
Given the choices, LEDs are almost always the best recommendation for kitchen lighting due to their efficiency, lifespan, and versatility.
Color Temperature and Color Rendering Index (CRI)
Beyond just brightness, the quality of light – how it looks and how accurately it renders colors – is incredibly important in a kitchen. This is where color temperature and Color Rendering Index come in.
Understanding Color Temperature (Kelvin)
Color temperature, measured in Kelvin (K), describes the perceived «warmth» or «coolness» of light. It’s not about how hot the bulb actually gets, but the hue of the light it emits.
- Warm White (2700K — 3000K): This light has a yellowish-orange tint, similar to traditional incandescent bulbs or candlelight. It creates a cozy, inviting, and relaxing atmosphere. It’s often chosen for dining areas or kitchens aiming for a traditional or rustic feel.
- Neutral White / Bright White (3500K — 4000K): This is a balanced white light, neither too yellow nor too blue. It’s clean, crisp, and energetic, making it a popular choice for active spaces like kitchens and bathrooms. It provides good visibility for tasks without feeling stark.
- Cool White / Daylight (5000K — 6500K): This light has a bluer, sometimes almost purplish, tint, mimicking natural daylight on a clear day. It’s very bright and can feel invigorating, but for some, it might feel too sterile or harsh in a home kitchen. It’s often used in commercial settings or workshops where maximum visual clarity is paramount.
Recommended Color Temperatures for Kitchens
For most home kitchens, a neutral white (3500K — 4000K) is often the sweet spot. It provides excellent task visibility without making the space feel cold.
- 3000K can work well for a slightly warmer feel while still being functional.
- If you have an open-concept living space, you might want to match your kitchen lighting to adjacent rooms, or use warmer tones for ambient lighting and brighter tones for task lighting. For example, 2700K for pendants over a dining table and 3500K for under-cabinet lighting.
- Avoid going much above 4000K for general kitchen lighting, as it can start to make food look unappetizing and the space feel less homely.
Understanding Color Rendering Index (CRI)
CRI is a measure (on a scale of 0 to 100) of how accurately a light source renders colors compared to natural sunlight. A high CRI means colors will appear more vibrant, true, and natural under that light.
- CRI 80-89: This is considered good and is suitable for most residential applications. You’ll find many standard LED bulbs in this range.
- CRI 90+: This is excellent and means colors will look very true-to-life. For tasks like food preparation, where distinguishing subtle color variations (e.g., ripeness of fruits, doneness of meat) is important, a high CRI is highly beneficial. It makes your countertops, cabinets, and food look their best.
Why High CRI Matters in the Kitchen
Imagine trying to chop vegetables or plate a meal under a low CRI light – colors might appear dull, muted, or even slightly off. A high CRI light makes your food look more appealing, helps you see stains or dirt more easily, and accurately displays the true colors of your finishes, like cabinet paint or countertop patterns. Always aim for LED bulbs with at least an 80 CRI, and ideally 90+ CRI for task-specific areas.
Combining Color Temperature and CRI
When selecting bulbs, look for both desired color temperature and a high CRI. You can get a 3500K bulb with a CRI of 90+, providing both a balanced white light and excellent color accuracy. This combination will make your kitchen a joy to work in and spend time in.
Practical Considerations and Smart Solutions
Beyond the raw numbers, there are several practical aspects and smart technologies that can significantly enhance your kitchen lighting setup.
Dimmer Switches
Dimmers are a game-changer for kitchen lighting. They allow you to adjust the brightness of your lights to suit different activities and moods.
- Flexibility: Bright light for cooking and cleaning, then dim it down for dining, entertaining, or a late-night snack.
- Energy Savings: Dimming lights uses less electricity, extending bulb life.
- Mood Setting: Easily shift the ambiance from functional to cozy.
- Compatibility: Ensure you use LED-compatible dimmers if you’re using LED bulbs. Not all dimmers work with all LEDs, so check manufacturer specifications.
Smart Lighting Systems
Smart lighting takes dimmers to the next level, offering even greater control and customization.
- App Control: Control your lights from your smartphone or tablet, even when you’re not home.
- Voice Control: Integrate with smart home assistants like Amazon Alexa or Google Assistant for hands-free control.
- Scheduling: Set lights to turn on/off at specific times, useful for security or waking up.
- Tunable White: Some smart bulbs allow you to change the color temperature (e.g., from warm white to cool white) throughout the day to match your circadian rhythm or activity. This is fantastic for kitchens, allowing you to use cooler task lighting during food prep and warmer ambient light during dinner.
- Grouping and Scenes: Group multiple lights to control them together, or create «scenes» (e.g., «Cooking Mode» for bright task lighting, «Dinner Mode» for dimmed, warmer light).
Under-Cabinet Lighting Placement
Getting under-cabinet lighting right is key for effective task illumination.
- Placement: Mount LED strips or puck lights towards the front edge of the cabinet. This directs light onto the countertop and minimizes shadows from the cabinet lip itself.
- Continuous vs. Spaced: Linear LED strips provide continuous, even illumination. Puck lights offer focused spots of light; for even coverage, they need to be spaced appropriately.
- Power Source: Decide if you want hardwired lighting (cleaner look, professional installation often required) or plug-in options (easier DIY, but wires need to be managed). Battery-operated options are also available for smaller, less frequently used areas but generally aren’t bright enough for primary task lighting.
Lighting Over the Sink
The sink area is a high-traffic, task-oriented spot that often gets overlooked.
- Specific Fixture: A small pendant, a flush mount, or even a recessed light directly above the sink provides crucial task lighting.
- Water Resistance: Ensure any fixture near the sink is rated for damp locations if there’s a risk of splashing.
Ventilation Hood Lighting
Don’t forget the lighting built into your range hood. This is essential for illuminating your cooktop.
- Check Wattage/Lumens: Ensure these lights are bright enough for safe cooking. Many modern hoods come with integrated LED lighting that is quite effective.
- Maintenance: Keep them clean from grease buildup to maintain their effectiveness.
Professional vs. DIY Installation
While some lighting upgrades can be DIY projects (like swapping out bulbs or installing plug-in under-cabinet strips), others require professional help.
- Wiring: Any new wiring, moving existing fixtures, or installing hardwired components should ideally be done by a licensed electrician for safety and code compliance.
- Complex Systems: Smart home systems, especially those integrating multiple fixtures and switches, can be complex to set up correctly and may benefit from professional installation.
- Ceiling Work: Installing recessed lighting or new junction boxes in the ceiling often involves cutting into drywall and running wires, which is best left to someone experienced.
Taking the time to plan your kitchen lighting carefully, considering not just size and brightness but also color quality and practical controls, will result in a much more enjoyable and functional space. It’s an investment that pays off every day.