Top Kitchen Ceiling Light Energy Saving Tips for a Brighter Home
You’re looking to brighten up your kitchen without draining your wallet on electricity bills, and that’s completely achievable with a few smart choices. The simplest, most effective way to save energy on your kitchen ceiling lights is by switching to LED bulbs. They use significantly less power, last a very long time, and offer excellent light quality, making them a no-brainer for any home. But that’s just the start; there’s a whole world of practical tips to explore for a truly efficient and well-lit kitchen.
Understanding Your Current Lighting Setup
Before you jump into buying new lights, it’s really helpful to get a handle on what you’ve already got going on. A little detective work now can save you time and money later, ensuring you choose the right solutions for your specific kitchen.
Identifying Bulb Types and Wattage
Take a look at the bulbs currently in your ceiling fixtures. Are they incandescent, halogen, CFLs (compact fluorescent lamps), or maybe even some early LEDs? Each type has different energy consumption and light output. Incandescent bulbs, for instance, are real energy hogs, converting most of their energy into heat rather than light. Halogens are a bit better but still inefficient compared to modern options. CFLs were a step up, but they contain mercury and often take a moment to reach full brightness.
Most bulbs will have their wattage printed right on them or on the base. A higher wattage usually means more energy consumption. Don’t just look at the overall fixture; focus on the individual bulbs. You might have a multi-bulb fixture where replacing all of them will make a bigger difference. Understanding the current wattage gives you a baseline for how much energy you’re currently using and helps you calculate potential savings when switching to lower-wattage, higher-efficiency alternatives.
Assessing Light Distribution and Brightness
Beyond just the bulb type, think about how your current lights illuminate your kitchen. Are there dark corners? Is the island well-lit for food prep? Do you have enough light over the sink? Sometimes, it’s not just about more light, but better-distributed light. A single central fixture might leave task areas shadowed, forcing you to use additional lighting (like under-cabinet lights) that could be avoided with a more effective ceiling setup.
Consider the «brightness» or lumen output, not just wattage. Lumens measure how much light a bulb actually produces. For example, an older 60-watt incandescent bulb might produce around 800 lumens, while a modern LED can achieve the same 800 lumens using only 9-12 watts. So, when looking for replacements, aim for similar or slightly higher lumen output if you feel your kitchen is currently too dim, rather than just matching wattage.
Evaluating Fixture Condition and Style
While energy saving is the main goal, the condition and style of your existing fixtures also play a role. Older fixtures might be less efficient even if you put new bulbs in them. For example, deeply recessed can lights with older trim rings can trap light, reducing its effectiveness. Sometimes, a completely new fixture with an integrated LED array can offer superior light distribution and efficiency compared to trying to retrofit an old one.
Also, think about the aesthetic. If you’re going to the effort of upgrading, do you like the look of your current fixtures? A dated fixture might not be worth investing in new high-tech bulbs if you’re planning a kitchen refresh down the line. Sometimes, a complete fixture replacement is the most practical and visually appealing long-term solution.
Smart Bulb Choices for Maximum Efficiency
This is where the rubber meets the road for energy savings. Choosing the right bulbs can dramatically cut down your electricity use without sacrificing brightness or quality of light.
The Power of LED Technology
Let’s be clear: LEDs (Light Emitting Diodes) are the undisputed champions when it comes to energy-efficient lighting. They are miles ahead of incandescents, halogens, and even CFLs. LEDs work by passing an electric current through a semiconductor material, which emits light. This process is incredibly efficient, converting a much higher percentage of electricity into light compared to traditional bulbs that generate a lot of heat.
Here’s why they’re so great:
- Massive Energy Savings: LEDs use about 75-80% less energy than incandescents for the same light output. That’s a huge chunk off your electricity bill just for lighting.
- Incredible Lifespan: An LED bulb can last 25,000 to 50,000 hours or even more. Compare that to an incandescent’s 1,000-hour lifespan. This means you won’t be changing bulbs nearly as often, saving you time and money on replacements.
- Durability: LEDs are solid-state devices, meaning they don’t have filaments that can break. They’re much more resistant to vibration and impact.
- Instant On: Unlike CFLs, LEDs provide full brightness the moment you flip the switch.
- Cool Operation: They emit very little heat, which can actually help reduce your air conditioning costs in the summer.
- Environmentally Friendly: LEDs don’t contain mercury, unlike CFLs, making them safer and easier to dispose of.
When selecting LEDs, look for the «lumens» rating, which indicates brightness, and the «watts» rating, which indicates energy consumption. You’ll often find a small number of watts delivering a high lumen output. Also, consider the «color temperature,» measured in Kelvin (K). Lower Kelvin numbers (e.g., 2700K-3000K) produce a warm, yellowish light, similar to traditional incandescents. Higher numbers (e.g., 4000K-5000K) provide a cooler, whiter light, often preferred for task lighting in kitchens.
Dimmer Compatibility and Smart Features
While LEDs are energy-efficient on their own, pairing them with dimmers can enhance savings and functionality. A dimmer switch allows you to reduce the light output, which in turn reduces energy consumption. This is perfect for setting different moods in the kitchen – bright for cooking, softer for dining or evening relaxation.
However, not all LED bulbs are compatible with all dimmer switches. Look for LED bulbs explicitly labeled «dimmable.» Also, you might need to upgrade your existing dimmer switch to an LED-compatible one. Older dimmers designed for incandescent bulbs can cause flickering, buzzing, or inconsistent dimming with LEDs. Modern LED dimmers are designed to handle the lower power draw and specific electrical characteristics of LEDs, providing smooth, silent operation.
Beyond dimmers, smart LED bulbs offer even more control and potential savings. These bulbs can connect to your home’s Wi-Fi network and be controlled via an app on your smartphone or through voice assistants like Alexa or Google Assistant. Smart features include:
- Scheduling: Set lights to turn on or off at specific times.
- Remote Control: Turn lights off even after you’ve left the house if you forgot.
- Color Tuning: Some smart bulbs allow you to adjust not just brightness but also the color temperature, from warm white to cool daylight, or even various colors, for ultimate flexibility.
- Occupancy Sensors: Some smart lighting systems can integrate with motion sensors, turning lights on when you enter the kitchen and off when no one is present, though this is often more practical for areas like pantries or utility rooms.
While smart bulbs typically have a slightly higher upfront cost, the added convenience, control, and potential for even greater energy savings can make them a worthwhile investment for many.
Exploring Integrated LED Fixtures
Sometimes, the best approach isn’t just replacing bulbs, but replacing the entire light fixture. Integrated LED fixtures have the LED components built directly into the fixture itself, rather than using replaceable bulbs. These often offer several advantages:
- Optimized Design: Since the LEDs are part of the fixture, manufacturers can design them for optimal light distribution and efficiency, often leading to better performance than retrofitting an old fixture.
- Sleeker Aesthetics: Integrated fixtures can have very low profiles and modern designs, as they don’t need bulky sockets or bulb access. Think slim panel lights, modern track lighting, or under-cabinet strips.
- Long Lifespan of the Whole Unit: While you can’t replace individual bulbs, the LED components are designed to last for tens of thousands of hours, often exceeding the lifespan of the fixture itself. If an LED fails, the entire fixture usually needs to be replaced, but this is a rare occurrence given their longevity.
- Improved Light Quality: Many integrated fixtures offer very even light output without «hot spots» or shadows, which is excellent for kitchen tasks.
Examples of integrated LED fixtures commonly used in kitchens include:
- LED Recessed Lights: These are popular for general ambient lighting, providing a clean, unobtrusive look.
- LED Track Lighting: Great for directing light to specific task areas or highlighting features.
- LED Under-Cabinet Lighting: Essential for illuminating countertops for food preparation and adding accent lighting.
- LED Flush Mounts or Semi-Flush Mounts: Modern versions offer high lumen output in a sleek package, ideal for smaller kitchens or areas where a pendant might be too low.
- LED Strip Lights: Versatile for accent lighting, toe-kick lighting, or even inside cabinets.
When considering integrated fixtures, pay close attention to the overall lumen output, the color temperature, and the «CRI» (Color Rendering Index), which measures how accurately a light source reveals the true colors of objects. A CRI of 90 or above is excellent for a kitchen, where accurate color representation of food is important.
Optimizing Light Placement and Design
It’s not just about how efficient your bulbs are; it’s also about how effectively you’re using them. Smart placement and design can significantly reduce the number of lights you need and the energy consumed.
Layering Light for Functionality
A truly well-lit kitchen doesn’t rely on a single, overpowering light source. Instead, it uses layers of light, each serving a specific purpose. This approach is much more energy-efficient because you only turn on the lights you need for the task at hand, rather than blasting the entire room with full brightness.
The three main layers of light are:
- Ambient Lighting: This is your general, overall illumination that brightens the entire room. Think recessed lights, a central flush mount, or a semi-flush fixture. The goal here is comfortable brightness that allows you to navigate the kitchen safely.
- Task Lighting: This is crucial for specific activities like chopping vegetables, reading recipes, or washing dishes. Task lights are directed to provide focused illumination exactly where you need it. The most common examples in a kitchen are under-cabinet lights over countertops, pendant lights over an island or peninsula, and perhaps a dedicated light over the sink.
- Accent Lighting: This layer adds visual interest, highlights architectural features, or showcases decor. It’s often decorative and less about practical illumination. Examples include in-cabinet lighting, toe-kick lighting, or small spotlights on artwork.
By using these layers, you can switch on just the under-cabinet lights for food prep, or just the ambient light for a quick snack, rather than turning on everything all the time. This targeted approach is a major energy saver.
Strategic Placement for Task Areas
Getting task lighting right is perhaps the most impactful design choice for energy saving. When task areas like countertops, islands, and the sink are adequately lit, you avoid relying on overly bright ambient lighting to compensate. This prevents you from needing more recessed lights or a brighter central fixture than necessary.
- Under-Cabinet Lighting: This is non-negotiable for kitchen countertops. LEDs are perfect here – thin strips or puck lights provide direct, shadow-free illumination on your workspace. They eliminate the need for overhead lights to shine past your body, creating shadows on the very area you’re trying to illuminate.
- Pendant Lights over Islands/Peninsulas: These provide focused light directly onto your work surface, ideal for prepping, dining, or doing homework. Ensure they’re hung at the correct height to avoid glare and maximize their effectiveness.
- Sink Lighting: A small recessed light or a dedicated mini-pendant above the sink ensures you have clear visibility for washing dishes.
When placing task lights, think about where shadows might fall. The goal is to illuminate the actual work surface without creating glare or shadows caused by your own body.
Maximizing Natural Light
The most energy-efficient light of all is free: natural daylight. While you might not be able to remodel your kitchen just to add more windows, there are ways to maximize the natural light you already have.
- Keep Windows Clean: It seems obvious, but dirty windows can significantly block natural light. Regular cleaning makes a noticeable difference.
- Use Light-Colored Surfaces: Light-colored walls, ceilings, and even countertops reflect natural light deeper into the room. Darker colors absorb light, making the room feel dimmer and requiring more artificial light.
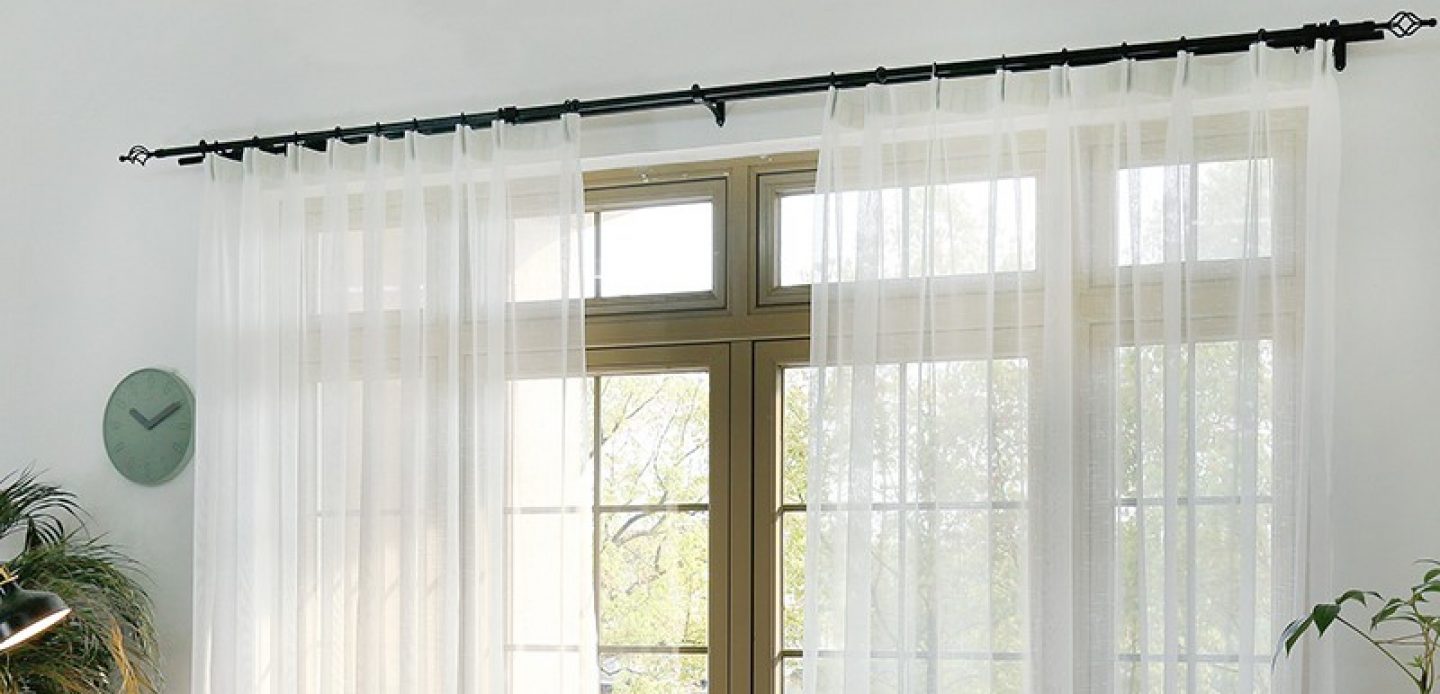
- Avoid Heavy Window Treatments: If privacy isn’t a major concern, opt for sheer blinds or curtains, or keep them open during the day. If you need privacy, consider top-down/bottom-up blinds that allow light in from the top while maintaining privacy below.
- Consider Reflective Surfaces: Mirrored backsplashes or glossy cabinet finishes can subtly help bounce natural light around the room.
- Strategic Placement of Reflective Objects: A strategically placed mirror or piece of shiny decor might reflect light into a darker corner.
By making the most of natural light, you can delay turning on your artificial lights, or even avoid them entirely during daylight hours, leading to significant energy savings.
Leveraging Controls and Automation
Even the most efficient bulbs can waste energy if they’re left on when not needed. Modern lighting controls offer simple yet powerful ways to ensure your lights are only on when they truly are, and at the optimal brightness.
Dimmer Switches for Adjustable Brightness
We touched on dimmers briefly with LED compatibility, but their role in energy saving is worth reiterating. A dimmer switch allows you to reduce the light output of a fixture, which directly translates to reduced energy consumption.
Think about it: do you always need your kitchen lights at 100% brightness? Probably not. When you’re just grabbing a snack, or having a quiet dinner, or when there’s some natural light filtering in, you might only need 50% or 75% brightness. By dimming your lights even slightly, you’re saving energy.
Modern LED-compatible dimmers are crucial here. They not only prevent flickering and buzzing but also often offer a wider dimming range, allowing you to go much lower in brightness, maximizing potential savings. Installing dimmers on your ambient and task lighting circuits is one of the quickest and most effective control upgrades you can make. It also adds a lot to the ambiance and functionality of your kitchen.
Occupancy and Vacancy Sensors
These are incredibly practical for areas where you might forget to turn off the lights.
- Occupancy Sensors: These automatically turn lights ON when motion is detected and OFF after a set period of no motion. They’re great for pantries, utility closets, or even walk-in kitchens where you frequently enter and exit with full hands. The downside is that they can sometimes turn off if you’re very still for an extended period (like intently stirring something at the counter).
- Vacancy Sensors: These require you to manually turn the lights ON, but they automatically turn them OFF after no motion is detected for a set time. This is often preferred in main kitchen areas, as it prevents lights from coming on unnecessarily but ensures they don’t stay on when no one is around.
Both types of sensors are particularly useful in less frequently used kitchen zones or transitional spaces connected to the kitchen, where a light might otherwise be left on for hours. They are fairly easy to install, often replacing a standard light switch, and pay for themselves quickly through saved energy.
Timers and Smart Home Integration
Beyond simple sensors, timers and smart home systems offer more sophisticated control over your kitchen lighting.
- Timers: Basic timers can turn lights on and off at specific times of day. This is useful if you want lights to come on automatically in the morning or evening, or to ensure they turn off by a certain time (e.g., after everyone is typically asleep). While less flexible than smart systems, they’re a step up from manual control.
- Smart Home Integration: This is where things get really powerful. If you have a smart home hub (like Apple HomeKit, Google Home, Amazon Alexa, or a dedicated system like Hubitat or SmartThings), you can integrate your smart LED bulbs or smart switches into routines and scenes.
- Scheduled Routines: «Good Morning» routine turns kitchen lights on at a low brightness, slowly increasing. «Good Night» routine turns all kitchen lights off.
- Geofencing: Lights can turn on when you arrive home and off when you leave, ensuring you never come home to a dark house or leave lights on by accident.
- Voice Control: «Alexa, turn kitchen lights to 50%» or «Hey Google, turn off kitchen island lights.»
- Custom Scenes: Create a «Cooking» scene with task lights bright and ambient lights at 75%. Create a «Dinner» scene with ambient lights dimmed and pendants at a warmer temperature.
- Integration with Other Sensors: Imagine lights turning on automatically if a door sensor indicates the back door was opened after dark, or if a smart smoke detector goes off, lights flash to guide you.
While a full smart home setup might seem complex, even starting with a few smart LED bulbs and a voice assistant can open up a world of convenient and energy-saving lighting control. The ability to easily adjust brightness, schedule operations, and remotely verify light status means you’re always in control of your energy consumption.
Maintenance and Long-Term Savings
Once you’ve made smart choices for your kitchen lighting, a little ongoing attention ensures you continue to reap the energy savings for years to come.
Regular Cleaning of Fixtures and Bulbs
It’s easy to overlook, but dust and grime can significantly reduce the light output of your fixtures and bulbs. A layer of dust on a bulb or inside a fixture’s diffuser can block a surprising amount of light, making your kitchen appear dimmer. What happens then? You might be tempted to turn on more lights or install brighter bulbs, inadvertently increasing energy consumption.
Make it a habit to periodically wipe down your ceiling fixtures, especially those with glass shades or diffusers. For recessed lights, carefully clean around the trim rings and the bulb itself (when it’s cool, of course). This simple task ensures that the light produced by your energy-efficient bulbs actually reaches your kitchen space, maximizing its effectiveness without needing extra wattage.
Replacing Aging or Damaged Components
Even with the long lifespan of LEDs, other components in your lighting system can wear out over time.
- Fixture Wiring: Over decades, wiring can degrade, becoming less efficient or even a safety hazard. If you notice flickering that isn’t bulb-related, or signs of burning around sockets, it’s time for an electrician to inspect the wiring.
- Socks and Ballasts (if applicable): While LEDs often don’t use traditional ballasts, older CFL fixtures do. If a CFL fixture is failing, it’s usually more energy-efficient and cost-effective to replace the entire fixture with an integrated LED one. For traditional screw-in sockets, ensure they are clean and free of corrosion for optimal contact.
- Dimmers and Switches: As mentioned earlier, old dimmers might not be compatible with LEDs. If you experience buzzing or flickering with new LED bulbs, upgrading your dimmer to an LED-compatible one is necessary. Similarly, worn-out switches can lead to intermittent power or even safety issues.
- Integrated LED Fixture Components: While the LEDs themselves last a long time, the driver (the electronic component that supplies power to the LEDs) can sometimes fail before the LEDs do. If an integrated LED fixture stops working, it usually means the entire fixture needs replacement, which, while an expense, is less frequent than traditional bulb changes.
Addressing these issues promptly ensures your lighting system operates safely and at peak efficiency. Ignoring them can lead to wasted energy, diminished light quality, or even electrical hazards.
Keeping Up with New Technologies
The world of lighting technology is constantly evolving, with new innovations bringing even greater efficiency and functionality. While you don’t need to upgrade your lights every year, it’s worth keeping an eye on advancements.
- Improved LED Efficacy: Newer generations of LEDs are continuously becoming more efficient, producing more lumens per watt. If you have very early generation LEDs (say, from 5-10 years ago), a newer LED bulb might offer the same brightness with even less energy consumption.
- Smarter Controls: Smart home systems and lighting controls are becoming more sophisticated, user-friendly, and affordable. Features like adaptive lighting (which automatically adjusts color temperature throughout the day to mimic natural light cycles) or more robust occupancy sensing are always being refined.
- Better CRI and Color Tuning: Newer bulbs and fixtures often boast higher Color Rendering Index (CRI) ratings, meaning they render colors more accurately, which is excellent for a kitchen environment. More advanced color-tuning options in smart bulbs allow for even greater flexibility in setting the perfect ambiance.
- Emerging Technologies: While still in niche applications, technologies like OLEDs (Organic Light Emitting Diodes) could eventually make their way into more general lighting, offering ultra-thin, flexible, and highly efficient light sources.
Staying informed means you can make educated decisions when it’s time for your next lighting upgrade or if you’re planning a major kitchen renovation. Investing in the latest efficient technology can ensure your kitchen remains brightly lit with minimal energy impact for the long haul.